My Favorite Concealer

If ever you are presented with the desert island-what’s the one thing you would take-conundrum, let me provide you with an answer…MAC’s Pro Longwear Concealer.

It masks everything from imperfections to dark circles in the smoothest way possible.

Picture courtesy of maccosmetics.com

It makes your skin feel unbelievably soft. Plus it doesn’t settle into fine lines and provides the perfect base for your foundation to lay.

I bought it a while back, but stopped using it so I had this gem of a product just taking up space in my makeup drawer.  Then I heard from a former MAC makeup artist (who had tried every other concealer under the sun) how great this stuff was, so I decided to give it another chance.

You may be alarmed when you first pump it on your finger – there seems to be a sizable amount that comes out. But don’t worry, it ends up being just right.

Put it all around your eyes (even the corners) and at the outer corners of your nose (where it meets your face) to prevent the redness that pops up sometimes at the end of the day.

Also note, the pump is the one to use for under your eyes. The one with the wand is for spot treatment.

You’re going to have to give it a try. It’s $20 but it will last you a long time, and it will make your foundation (or BB cream) work that much better.

See you tomorrow!

Continue Reading

4 Steps to a Cleaner Makeup Bag

It’s good to clean out your makeup for the same reason it’s good to clean out anything: it makes you feel so good afterwards!

When you go to apply things to your face, you want those things to look fresh and clean and neat, not dirty and gross. Take a few minutes to follow these steps and I promise it’ll make you feel so good!

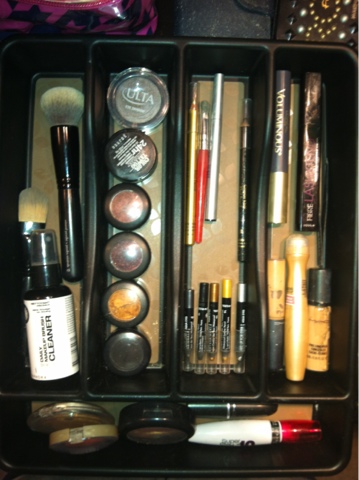
1. Take all your makeup and organize it by: eyes, lips, cheeks, skin.

Right off the bat this will allow you to see what you have multiples of. Sometimes you can buy the same shade of something and not even realize it.

Find any multiples? Toss the oldest one or if nothing is really old, start a smaller bag that you can take on the go.

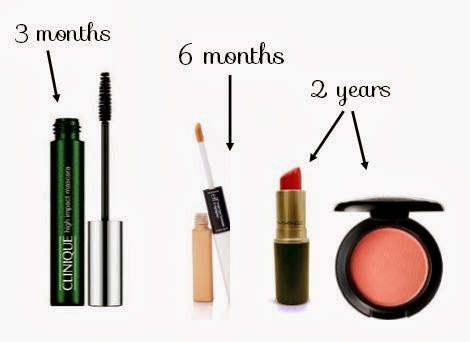
2. Eliminate by date.

Believe it or not, makeup can expire. And even though you paid $60 for a product that’s not finished, if you bought it 3 years ago it’s probably not doing you any good.

At this part in the process, toss anything that doesn’t smell or look right.

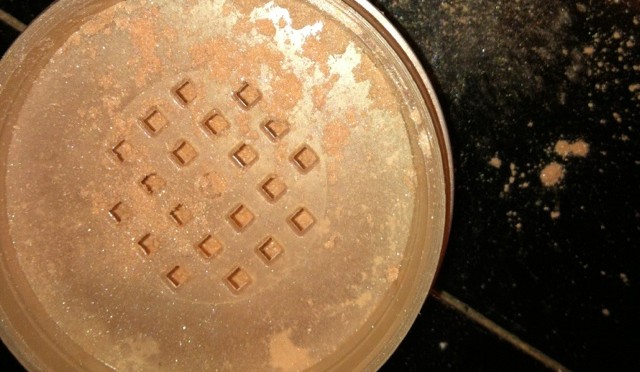
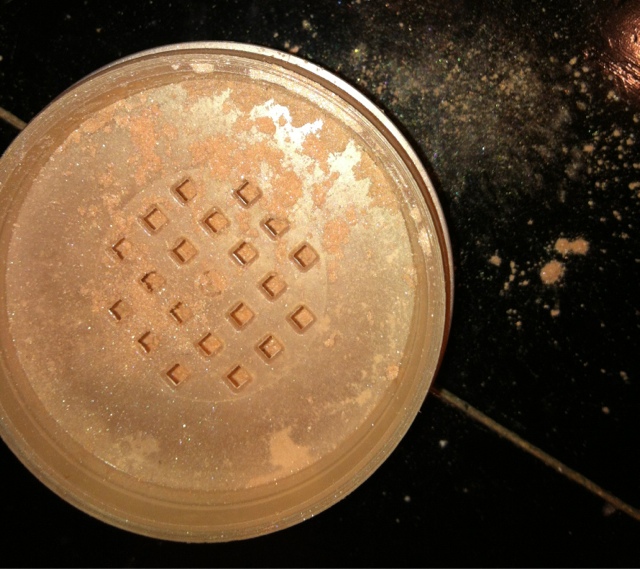
Powders like eye shadows, blushes and bronzers have the longest shelf life. If you still want to test one, first smell it and make sure it doesn’t smell like chemicals, rub your finger over it make sure it’s got a silky texture, then check the color and make sure it looks opaque on your finger. Finally, rub it on the back of your hand to ensure it can still blend.

Here’s a quick break down of the lifespan of each category:

Toss any brushes if they’re shedding hairs. You don’t want those all over your face!
Also get rid of anything you haven’t used in 6 months. Products that you dip your fingers into, or ones that goes around/in your eyes can build up bacteria if you’re not careful.

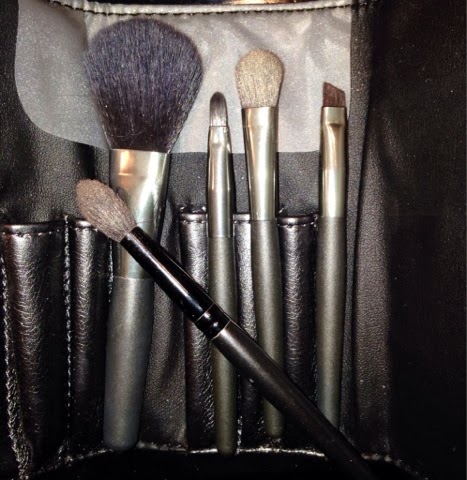
3. Pull out the essentials.

For brushes you’ll need 2 medium-large brushes for bronzer and blush. You’ll need a narrow angled brush (it’s my go-to cat eye tool), a smudge brush, a wider shadow brush for all over color, and a medium tapered brush for contouring. 

For lips you’ll need a sheer shimmer, lipstick (without shimmer), clear gloss and lip liner. These will help you to mix and match for a range of looks from simple to dramatic.
If you’ll first pull out the essential items, you’ll easily see what’s expendable. Go through this pile and see if there’s anything you haven’t used in a while that you can get rid of/move to a smaller bag.

4. Clean off everything.

I don’t care if you paid $1 or $100 for your makeup, clean off their packages so they look better. It doesn’t feel good to apply something that’s coming out of a container that’s all smudged and gross. 
Wipe everything down, clean off your brushes (use this) then turn your makeup bag inside out and run it through the dishwasher. This will give you that extra sense of fresh when you back only the items that you know are safe and good to use.

Start 2014 off right with a makeup bag that’s fresh and clean! (Today was supposed to be about cleaning out your jewelry box, but there was so much information about this from the show that I wanted to pass on more details…stay tuned for the jewelry box edition!)

Continue Reading

$7 Away from Happiness

In case you missed this amazingness…
Last Tuesday’s segment included an idea that I think deserves a pat on the back.

No, it didn’t come from Pintrest :-p (to no one in particular), I started this a long time ago. Back in the days when we literally pinned things to boards.

I’m talking about the silver ware tray as a makeup drawer organizer. I know, genius right? Thank you, that’s so unexpected ;)

Don’t worry I’m almost done tooting my own horn…

What made a great idea even better (I said “almost” done!) was when I went to Wal-Mart to purchase an updated silverware tray.

In preparation for the show, I realized looking at my old silverware holder, that there’s no WAY I could show that on TV. It was white, which meant every single little makeup stain, leak or accident that had happened since I last washed it (…eeeh I can’t remember when that even was) was showing up making it look disgusting.

So a trip to Wal-Mart and $7 later, I was on my way home with a brand new version of my genius idea.  And this time it was even better!! I picked up a black tray with a beige inside. What’s so great about that, you ask? The makeup stains my other one highlighted so obnoxiously, will no longer be so obvious!

Now if something leeks, spills, or falls out I won’t have to stare at if for months no matter how much bleach I take to it.

Seven dollars, friends, made me a very happy girl.

Try this little organizational tip in your makeup drawer! I will admit, not all of my makeup fits as tidy as I’ve lead you to believe (that’s about 1/4th of my eyeshadow collection). But once you clean out what you don’t use, and put into categories and compartments everything you do, you’ll at least be able to find things more quickly then you would rooting around a dirty drawer.

Yay for my genius idea! Ok that’s the last time, I promise. You can write and tell me how great my idea was and ways you’re using it at thespiffblog@gmail.com ;)

Continue Reading

Santa’s Little E.L.F

There’s a dirty little makeup secret out there, and by dirty little secret I mean it’s out there and people know about it and now so will you. It’s the make up line e.l.f. (it stands for eyes lips face).  It also stands for really, really, REALLY cheap makeup.  I’m talking eyeshadow: a dollar, BAM. Mascara: three dollars, BAM. And while you’re thinking this thing is too good to be true…
It’s not. And it’s a great idea for younger people on your list that you’re not exactly sure what to get.
 What makes this particular beauty buy so great is that it’s got eye shadows on one side and a tutorial as to how to put them on, complete with a color by numbers diagram on the other. 
So not only do you endow the person you get it for with beautiful eye shadow colors, but you also equip them with the ability to put them on perfectly! 
And the good news is, this book can also be found in town at Forever21 and Target.
It’s a Christmas miracle!
Continue Reading

Eyes, Cheeks, Arms, Legs, Hair All Aglow

It’s Friday, AND it’s Christmas time…could it BE more exciting!?
Let’s make sure it’s more than our eyes that are “all aglow” this time of year, shall we…
On Tuesday I talked about a shimmer powder (that we had to “imagine” because I left it on my dresser). Here is that illusive powder (it’s by Revlon), and here’s why you should own some…
Dust it on the apples of your cheeks and it contours your face and adds warmth to your smile.
Use it as a highlighter under your eyebrows and it will give the perfect little reflection and finishing touch to your face in photographs.
Dust some in your lotion and rub on your legs, but go further than that. If you’re wearing a dress that shows your neckline, rub it on your collar bone to give a perfect sexy little glow to your skin.
If you’re exercising your right to bare arms at your next holiday party, rub that same shimmer infused lotion down the front of your arms so as to make them appear slimmer (it will draw the eye to just the right areas *wink)
Heck, dust some in your mousse and scrunch it into your hair for a faint glimmer every time it hits the light. 
Now, unless you plan on rigging a hook to the back of your shirt and hanging off a Christmas tree from now until the 25th-do NOT do all of this at one time. 
Leave out the hair thing if you’re going to dust it on your skin. And go lightly on your face if you’re going to do it on your decolletage and arms.
If (and only if) the shimmer (like the one shown) is super fine and almost undetectable then (and only then) would I sign off on doing it everywhere (and only because it’s the holidays).
What you want to do is look glowy without people being able to pin point why (so if you get, “are you pregnant?” at least three times-you’ve done your job ;)
Merry Christmas!
Continue Reading