Ikat? I can.

Nail art is really just grown up arts and crafts.
It’s for those of us who miss that part of our lives (along with a designated nap time).

I know I rant and rave about it sometimes (catch me on the wrong end of a nail art experiment, late Saturday night, and you’ll hear all the negatives about it-no problem).

This one, however, really had me curious, especially after it turned out better while I was in the process of trying to remove it.

I thought I’d give this Ikat pattern technique a whirl last night.

The Ikat pattern is everywhere right now. And while I’ve yet to like it enough to spend money on it, I will do a test run of my love by putting it on my nails. Just two of them though, I’m not yet that gun ho.

It’s a pretty interesting technique, and I was very curious to see whether or not it would work.

Here’s what I did…

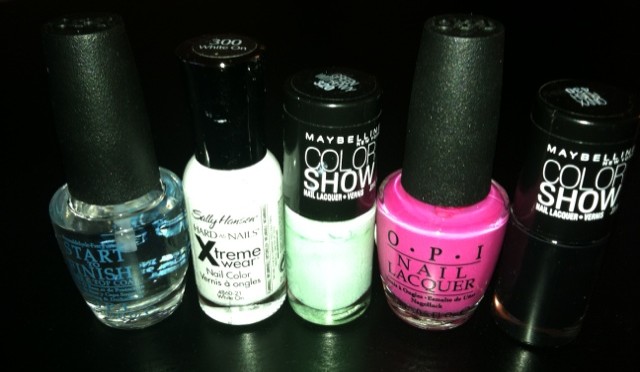
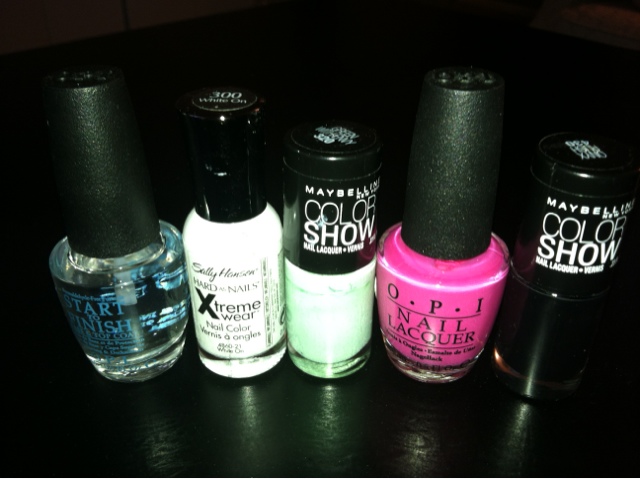
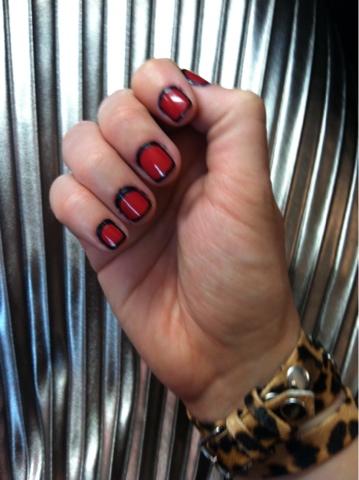
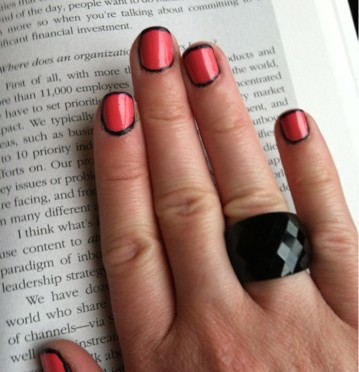
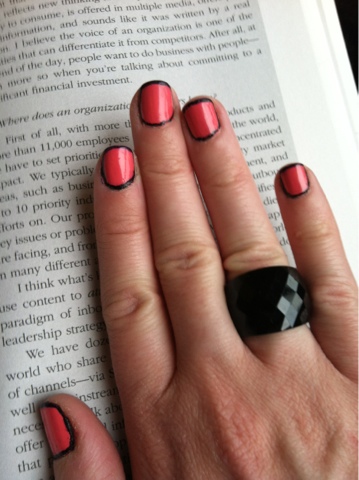
I picked out my colors: white, pink, black, and Tiffany blue (aka: Maybelline’s “Green with Envy”)

Then I painted them alternately on my ring fingers. So first a full nail of white…let it dry…then a full nail of pink, then so on and so forth.

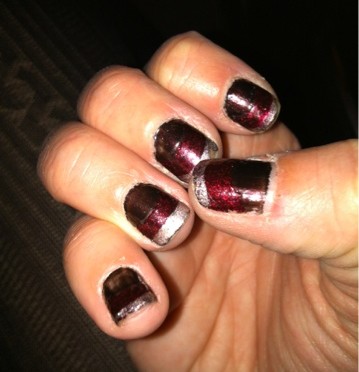
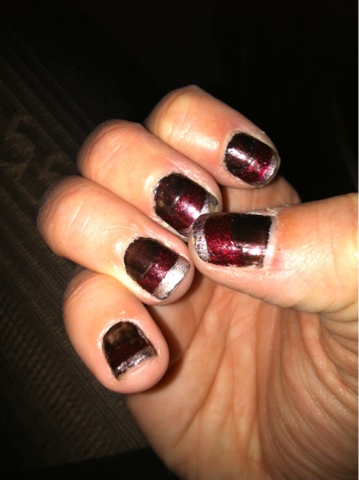
Ok, here’s where it got interesting…after your nail is completely dry, you take a Q-tip and dip it in nail polish remover and you drag it in spots across your nail.

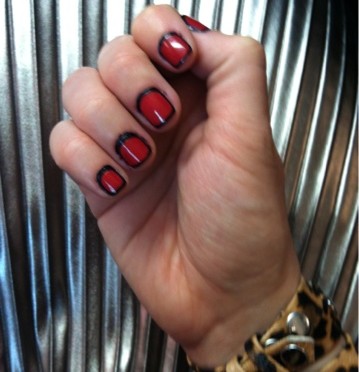
Now first, I went very slow and had only very little remover on the Q-tip, that did ok. It ended up leaving more cotton mess on my nail than anything else. It actually wan’t until I had heavily dipped a Q-tip in nail polish remover and was trying to get the whole thing off my nail that it started to look cool.

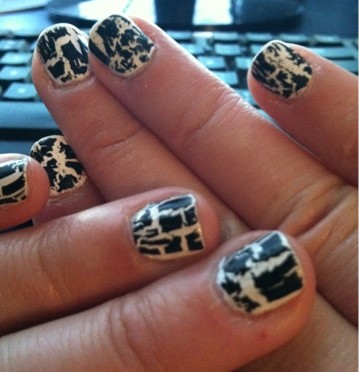
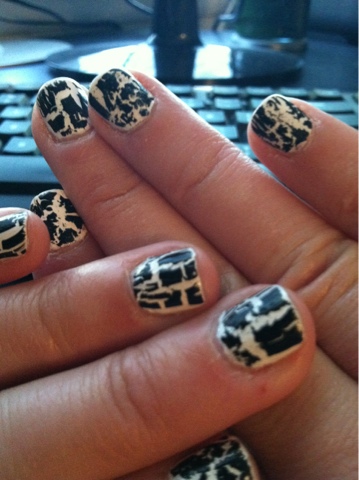
What ends up happening is the remover burns through all your layers and leaves a smearing of each color. Don’t worry if you burn all the way through and can see your nail, I just touched that part up with a sharpie a little bit.

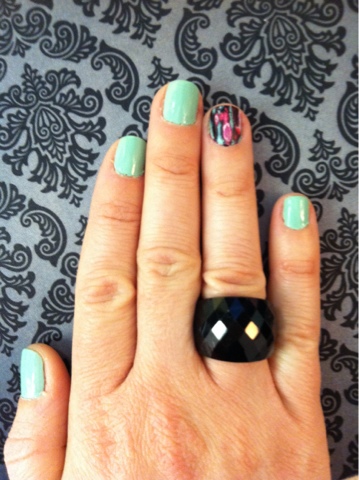
And you definitely don’t want it to look perfect, because that’s the beauty of the whole Ikat pattern. It’s smeary and blurry by nature so if you’ve imperfectly smeared, you’ve got it!

I don’t think I’d try to attempt this on all of my nails, but it certainly adds a bit of personality as an accent.

Continue Reading

What I do with my Saturday Nights

Saturday night would be a good time for a personal chef.

I like to spend that night of the weekend at home, on myself (hair, face, nails-the whole nine yards) but I always have to schedule everything around what I’m cooking (ie: Saute mushrooms, dry hair, pull chicken out of the oven, remove face mask).
Having a personal chef would solve that problem. And I’d only need him/her the one (maybe two) nights out of the week. I love to cook (and would quickly turn this into a fashion/foodie blog if that idea wasn’t already taken), but Saturday nights I would love to be able to devote to this *sweeps hand down silhouette.
This past Saturday night we had a delicious dinner of boursin cheese, portobello mushroom and roasted chicken pasta, while I emerged with a blow out and very clean pores. My nails, however, got put on the back burner (ha! pun!) until about 11:30 pm.
That’s when I started on my favorite little technique, as of late, the black outlined nails. I started with a very very pale pink (that I had thought was more lavender then it turned out to be) and that quickly degraded into a blithering mess (another problem with doing your nails late is things mess up, people get annoyed-it can be bad).
Thankfully, my husband was asleep and completely unaware that I started the whole painting process over from scratch at around midnight. I grabbed an OPI Red, threw on “His Girl Friday” and forced myself to wait while everything dried.
My nail art pen has unfortunately bit the dust, so I went with some black Sharpies to do the outlining. The downside to using a Sharpie is that it will always react and smear with a top coat-the catch being you have to have top coat on in order for it not to wear off. Oh well.
The end result wasn’t so bad (and not being on TV this week allows me to relax a bit more about it). It does solidify the fact that I love love love this nail technique. I would probably never grab and wear this red by itself, but outline it in black and-wow there’s the edge I’m looking for!
Here’s to hoping your Saturday nights are filled with pampering and a personal chef (Oo there’s an idea-Pampered Chef! Oh, wait… ;)
Continue Reading

I’d Like to Punch Pinterest in the Eye

I hate Pinterest.
Hate’s a strong word, so let’s say…I strongly dislike Pinterest, and I’m still working up the reasons why.

It’s like American Idol, I’m strongly not a fan of that show but if you were to debate that point with me, I’d have no good argument back. I just don’t like it.

Part of my problem with Pinterest is whenever you have a good creative idea that actually came from your brain, it breeds a paranoia that people are secretly thinking to themselves, “bet she found that on Pinterest.” Well, people, this weeks nails (and a bunch of other really great creative ideas in the world) DIDN’T come from Pinterest. So there.

It came the old fashion way-seeing it in a magazine.

And ladies-I know I say this a lot with every new nail technique I try but believe me when I say this from the bottom of my heart–I love it.

I didn’t at first. I finished a couple nails and thought, “Oo I don’t know about this one”, but the next morning I quickly realized-I’m in love!

I’ve already lined up two more colors I’m going to try with this. I think it’s perfect for waking up some old tired nail polishes. Especially the pastel colors I have-I love that it adds a little edge to girly colors which is perfectly me.

So enough about that, how did I do it? Every where I read said that what you’re supposed to do is paint a layer of black polish then paint over that with the color you want, leaving room around the edges for the black to peak out.

But I thought that one through, and I just couldn’t see how it would work. I feel as if I’d have clumps of nail color on top that would dry all funky and it would look terrible. So what I did was paint my color which is, by the way, Sally Hansen’s, “Coral Reef” (I know, that’s a snoozer of a name, right?) then I took another Sally Hansen product-the nail art pen in black and just drew around the edges of each nail.

Of course being a lefty-my right hand turned out much cleaner than my left, but by applying the same technique I use when painting my nails (which is when you’re using your non dominant hand to paint, move your dominant hand around while your other hand stays pretty still with the brush) it wasn’t as awkward as I thought.

Like I said, I loooooove it. And thankfully it turned out well on television, and didn’t end up looking like I had grease under my nails like I was worried it might.

In conclusion-Pinterest, you can shove it. ;)

*If you’re a big fan of Pinterest, I don’t mean any disrespect. To each his own :)

Continue Reading

Deck the Nails

Merry two days after Christmaaaaas!
I hope your holidays were nothing but good times with family food and fun :)

It’s hard to get back into the swing of things, so thank God for one more thing to celebrate…new years! For now, just sit back in your pile of gifts and wrapping paper mounds and read about my Christmas nails!

Big events like holidays pose a problem in my head when it comes to my nails. I don’t know where the pressure comes from because it’s really no different than any other week. I mean really the same amount or people see my fingers on a regular week as they do at a holiday so what’s the big deal all of a sudden?!

I don’t think I’ll ever get past that but we’ll see.

For Christmas, I wanted to incorporate red, glitter, and my very favorite OPI from the Muppet Collection and since I only have so many nails, I decided to do all three!!

What I started with is Sephora’s OPI “I’m with Brad”. I did a full solid color of that over my whole nail on all nails. Then I waited a long, LOOOONG time till the polish was perfectly dry and I took paper hole protectors…as seen here…and placed them on each nail at the position that I wanted the glittery red to show.

Then I painted that Essie glitter polish over the tip of my nail. I let that dry (which took no time at all) and I got that OPI “Designer De Better” and free handed a swipe across the tip of my nail, much like a French tip.

What I ended up with is the perfect combination of my every holiday nail desire. I think it turned out pretty great! I finished off the whole thing with a clear polish just to lock it all in.

But I will definitely do this technique again, and probably with different shades of the same color-I think that would look pretty 2013!

Well Merry Post-Christmas!

Continue Reading

“Classic” Nail Art

I put classic in quotes up there because shatter was really the trail blazer of this swing we’ve done into nail art.

I remember trying it for the first time, it definitely rocked my little nail world. From that point on, the color picking process went from “hmm what color…” to “HOly crap there are so many combinations to try!!!!!”

This week I was feeling a little in need of something wild and loud on my nails so I went with some old school shatter.

I was in love with this stuff on my toes for the longest time, why not go big and do it on all ten fingers? In the future it’s definitely going to make it on an accent nail because that would just look so chic.

Ok so here’s how I acheived this oh so neat-o look…
Start with base coat (of course!) and then go white. Now I cheated a little bit with a cheapo Sally Hansen white because, OPI-I love you, but sometimes you take five coats to give me solid color. So cheapo white, then a layer of OPI Funny Bunny then another layer of cheapo white (this is why I stay away from whites-you’ve got to layer so much to get it just right!).

Then some OPI black shatter. The trick to getting a good shatter is to layer thinly. However, the beautiful thing about Shatter is if you accidently get it too thick and it doesn’t “break” just right, just take your finger and “break” it up yourself.

Truly, it’s hard to mess this thing up.

Break up your nail routine with some old school Shatter!

Continue Reading